Monday, May 26, 2014

Sketch 316- Monday Lunchtime Sketch

Well Happy Monday and Happy Memorial Day!  I would like to say thank you to all who have served and are serving us in our military today and also to the families of the ones who have given their lives to keep us free, THANK YOU for your sacrifice.  Thanks to my husband for his 20 years of service and to my Son-in-law for his 12 years and continued service.
 
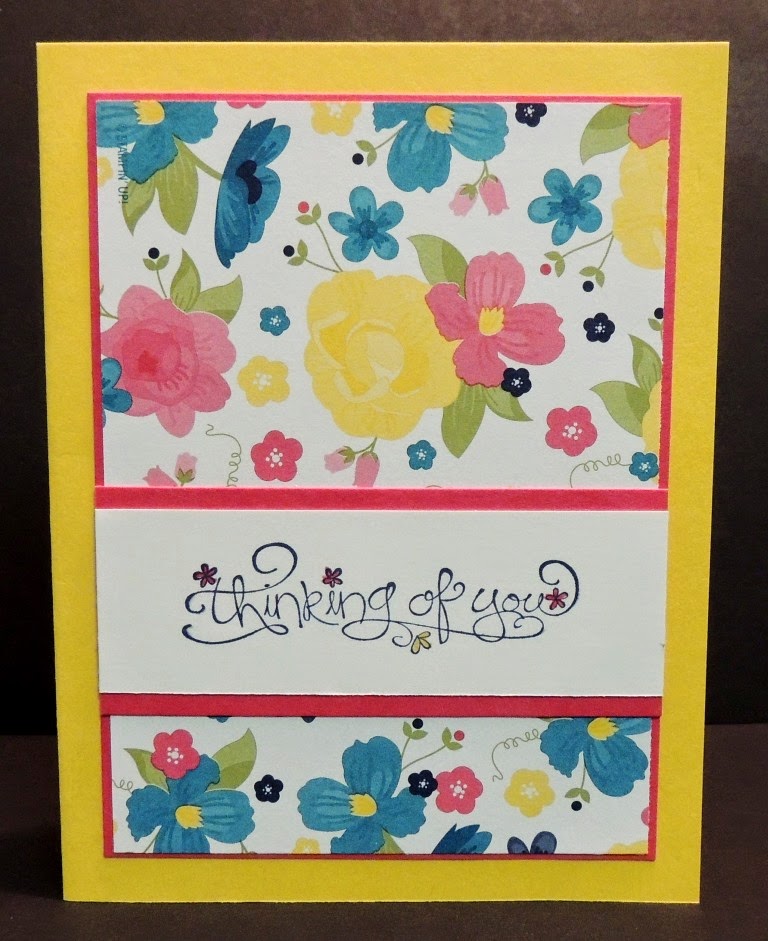
Now on to today's Monday Lunchtime Sketch.  I needed a 90th birthday card for a sweet and dear lady in our church and a wonderful part of my Sunday School class, so when I saw this sketch it was perfect for the card I had in mind.  So needless to say, I went to work and this is the outcome.
 
 
I just thought this designer paper was perfect for her and for the card.
 
Of course I had to decorate the inside and add a verse I found online and yes I used my digital studio to put it all together.
 
 
And I could not finish with just this, I had to make an envelope to match, so I used my envelope framelits.
 
 
So there you have it.  And, her daughter asked me if I would do a photo book for her mom, so I am going to put a gift card in side from me to do the photo album for her after it the party.  I hate to say, I will not be able to be at the party as I am scheduled to spend the weekend with my mom, but we will also celebrate her on Sunday morning after her party and I will be able to be there for that.
 
Make sure you go check out the sketch for this week over at Techno Stamper and you do not have to use Stampin' Up! products even though she would love for you too.  So please join us this week.  You will be glad you did and make sure you check out the rest of the design team's work.


Monday, May 19, 2014

Sketch 315- Monday Lunchtime Sketch

Hello all!  Today is my granddaughter's birthday and we celebrated her birthday while she was at my house this weekend.  They headed back to Virginia yesterday.  It was a nice weekend.
 
So now to share the card I made for her.  I of course used our Monday Lunchtime sketch to make her birthday card along with the card you can record that is on the stamping up clearance rack.  So my husband and I recorded her a happy birthday message.
 
Now more about the card.  Here is the outside!
 
 
And now for the inside.  She is a cheerleader and loves it, so I found a coloring page on the internet and using my digital studio, fit it to the size I needed and made the inside salutation using the text mode and one of the digital punches.  I then printed it and colored it in to match the paper.
 
 
So what do you think?  Isn't it just the cutest.  Well I think it is.
 
Also I bought her and Origami Owl Pendant, chain and charms.  When you get them, you get this cute little box to put it in.  So I also had to add a little Happy Birthday (Perfect Punches stamp set) and Ribbon to the box and here is how it looked.  The Stampin' up! colors worked so well with the color of the box.
 
 
And one more photo with the card.
 
 
I will say she loved it and I am so glad.
 
So anyway hope you enjoyed the post for today. 
 
Got to get to work, so Hope your Monday is blessed!  Remember to check out the other post of our DT team over at our Monday Lunchtime Sketch blog!


Wednesday, May 14, 2014

Making my own designer paper

Happy Wednesday everyone!  Today I want to share a another sample I did for this two week challenge at Late Night Stampers.  I will be linking this one, but please check out what the other stampers did.  I actually took the inspiration photo and chose some of my favorite colors in it and created the top layer of the card.  In other words, I created my own designer paper.  Don't you just love to do that.  I also found this wonderful and cute corner punch at 80% off and decided to use it on this card, inside and out.
 
 
Here is a side view of the card!
 
 
You can see the inside a little here.
 
Thanks for stopping by and don't forget to check out the other entries at Late Night Stampers Blog.
 

Monday, May 12, 2014

Sketch 31- Monday Lunchtime Sketch

Good Morning!  Hope you mother's had a wonderful Mother's Day!  I stayed with my mom the weekend, but came home in enough time yesterday to spend some time with my daughter who lives here and talked with my daughter who lives in VA.  She will be coming this weekend, so another big weekend.
 
Today Mary Jo has a wonderful sketch for us and I so enjoyed putting this card together.  I used the stamp from Backyard Basics.  I did not use the die to cut it out as I wanted to just color it in.  I used my markers for the coloring, 1 lighter and one darker in kind of matching colors.  I love how the flower turned out.
 
 
Here is the inside!


Thanks so much for stopping by today and don't forget to go check out the design team samples for this weeks Monday Lunchtime Sketch, and to add your card to the Linky Tool.  Can't wait to see what you all come up with.
 
Hope you have a wonderful and blessed Monday.

Thursday, May 8, 2014

Mother's Day Card #2

Wow, I have posted everyday this week and yes, I have another Mother's Day card for you today that I also did for the gentleman in our church.  This is the second one.
 
I actually printed the sentiment from My Digital Studio so I could make it bigger and almost made it too big, but I did like it.  The inside was also printed from My Digital Studio which for some reason I did not take a photo of it.  Thanks to Clean and Simple for their sketch this week which made this a quick and easy card.  Gotta love it!!!!
 
 
So what do you think?  I really enjoyed putting this one together and loved the ribbon as the border.
 
Thanks for stopping by again and hope your day is blessed.


Wednesday, May 7, 2014

Different Cut Mother's Day Card

I was asked to make two Mother's Day cards for a gentlemen in our church and today I am going to share one of those cards with you.  Actually last Thursday night we did this type card in our stamping class and I loved it.  So I decided to make this card in the same way.  So here it is.
 
 
Here it is partially open so you can kind of see how it is cut.
 
 
If you cut a piece of card stock in half on the 8 1/2" side, which would be 4 1/4 X 11, then take the 4 1/4 X 11 and place on the 9 3/4" mark and cut, you will have the size of this.  You will still score it at the 5 1/2 inch mark, but the one side will be shorter.  Then you can add the top portion of the card and to be honest I am not home and cannot remember the size I cut that piece.  I think it was 3 3/4 X 3 and the white piece would be 3 1/2 X 2 3/4.  I will check when I get home and correct this as needed.  Sorry about that.  But in reality you can decorate as you see fit.
 
So here is the inside.
 
 
I really think he was happy with this card. I had to make two, one for mom and one for the girlfriend.  Not sure which he will give to who, but I tried to make them so he could choose and they would work for both.
 
Thanks for stopping by today and hope your Wednesday is blessed.


Tuesday, May 6, 2014

Mother's Day Box Card

Happy Tuesday everyone.  This is a new one for me as I have not had much time to stamp much less share and this week, I have quite a few to share with you.  I will start today by sharing my mother's day card (box card).  I can't wait for her to open the envelope and see this.  I just love it.
 
 
Here is a side view of it!
 
 
And then a close up of it so you can see the glitter on the butterflies.  I embossed the flowers with white embossing powder and the punched them out.
 
 
The designer paper I used is a retired paper from stampin up and as I was going through my papers, I found it and knew I would use it to make this box card.
 
You can find the tutorial here and my first box card here!
 
Hope you like it and hope you have a wonderful Thursday!
 

Monday, May 5, 2014

LNS Challenge 248/Sketch 313- Monday Lunchtime Sketch

Good Morning everyone and hope you had a wonderful weekend.  Mine was very productive, but very tiring.  Today we have an exciting challenge over at our Late Night Stampers Group and the Monday Lunchtime sketch is awesome as always.  Our Late Night Stamper's challenge is an inspirational photo.  You can use the photo anyway it inspires you.  Of course I combined the challenges again and first here is the inspiration photo.
 
 
And here is what it inspired me to do along with the Monday Lunchtime sketch.
 
 
The colors that really stood out to me in the photo was the Richrazzle Berry, yellow - Daffodil Delight, Whisper white and the gray.  So that is the colors I chose for the card.  I also made another card for this challenge which I will share later in the week.
 
Don't forget to stop by and check out our design team samples as on both challenges they are wonderful.
 
Thanks for stopping by today and hope you have a wonderful and blessed day.
 

Monday, April 28, 2014

Sketch 312- Monday Lunchtime Sketch

Good Monday Morning.  Hope you all had a wonderful weekend.  I am here to share my sample with you this morning for our Monday Lunchtime Sketch.  I really enjoyed this sketch and the card was a lot of fun to put together.  So here you go.
 
 
This will probably be one of my Mother's Day card for one of my daughter's, so I will also be sharing with the LNS challenge going on right now.
 
Here is a close up for you!
 
 
I am loving these colors together.  I may try to come back later and give you a list of items I used, but I am at work and need to get to work.  So hope you all have a wonderful and blessed day.


Monday, April 21, 2014

LNS Challenge 247/Sketch 311- Monday Lunchtime Sketch

Happy Monday!  I can't believe it has been almost two weeks since I posted.  Went to my daughter's last weekend and was unable to get one completed before I left.  But I am excited about being back and completing the one for this week for both challenges.
 
This week the challenge for LNS is Mother's Day, so I really liked this weeks Monday Lunchtime sketch.  It just fit what I wanted for a mother's day card!
 
 
Here is a close up of the front!
 
 
A side view to show the dimension.
 
 
And of course the inside!
 
 
Stamp Sets: Messages for Mom (retired), Secret Garden, Papillon Potpourri
Card Stock: Whisper White, Island Indigo, Melon Mambo
Designer Series Paper: Gingham Garden
Secret Garden Framelits
Butterfly Punch
 
All Stampin' Up!
 
Thanks for stopping by and hope you have a wonderful and blessed week.


Tuesday, April 8, 2014

Designer Paper as Focal Point

I don't know about you, but there are times that I don't know how to use the Designer Paper.  But this week the clean and simple sketch helped me out a lot.  The designer paper was the focal point on this sketch and I was so excited to be able to do this card.  So here you go, a great way to use your designer paper.
 
 
This just showcases this beautiful paper and I love the card.  This stamp is a retired stamp by Stampin' Up! and I had planned on writing the name of it, but forgot to, so I will have to try and update this post tonight once I get home.  The designer paper is "Gingham Garden" by Stampin' Up and I love it.
 
Thanks for stopping by and hope your day is blessed.


Monday, April 7, 2014

LNS Challenge 246/Sketch 309- Monday Lunchtime Sketch

Well we are starting a new Week, hello Monday, and you know what Monday means.  Yes we have the Monday Lunchtime sketch along with a new challenge this week for you from our Late Night Stampers.  The LNS challenge this week is to show us how you use your ribbon.  I was so excited about this sketch and the ribbon challenge and had it all mapped out and the colors of card stock took me forever to decide.  So since I decided to use my in-color ribbon that will be going out this May, I decided to also use the in-color matching paper that would be going out as well.  And with the sketch and the challenge here is what I came up with.
 
 
I just love using the ribbon with my punches, but in trying to decide which punch, I used SU's retired punch instead of the new butterfly punch.  But that is OK, because I love how it turned out.  I used the pearls for the center of the butterfly. 
 
Here is a close up of the image!
 
 
This is so easy to do.  Just cut a piece of card stock a little larger than the punched out image.  Cover the card stock in adhesive and then add the ribbon.  Punch out the butterfly or whatever you decide centered in the paper and then adhere the ribbon part to the back of the cardstock with the punched out image.  Hope you got that!
 
Now please check out our design team samples for they are just wonderful.  You can find the sketch for this week here and the LNS challenge here.
 
Thanks for stopping by today and hope you have a wonderful and blessed Monday!


Monday, March 31, 2014

Sketch 308- Monday Lunchtime Sketch

Happy Monday to all of you.  Hope your weekend was just wonderful.  I had a goo weekend with some visitors on Saturday which was nice.  So now on to our sketch this week.
 
Loved the sketch Mary Jo has for us this week at Techno Stamper, but took me a while to figure out what I wanted to do with it.  I finally came up with this using some of the latest techniques I had seen, like water color and spritzing the ink on.  Took me a while to decide I liked it as I almost did a new and different card.  I guess if time had not gotten in the way, I would have.  But the more I look at it the better I like it.  So here it is and please let me know what you think!
 
 
And, another view of the card!
 
 
All items used are Stampin' Up!
Stamp Sets: By the Tide, Sassy Salutations
Card Stock: Water color Paper, Whisper White, Basic Black
Designer Series Paper: Venetian Romance
Ink: Calypso Coral, Black Stazon, Bermuda Bay,
Blender Pen
Banner Framelits
 
Thanks for stopping by and please check out the other design team members samples!

Saturday, March 29, 2014

My First Box Card

 
Well good Saturday Morning to you! Hope all is well with you and your day has started out just right!  I thought I would share my first box card with you today that I did on Thursday evening while my husband was at school doing an open house.  I am also linking this to our challenge this week at LNS as the challenge is Spring has Sprung and I thought this would be perfect.  I did use some retired Designer Paper, but it was my first and I did not want to mess up my not retired paper.  It actually turned out perfect I think.  I found the tutorial on Pinterest from Nancy Amato and followed it to a T!  Love tutorials that are so detailed.  Thanks Nancy and you can find the tutotial here!
 
Here is another view of the box card and yes it does fit in a medium size envelope.  Perfect for mailing to that special person.
 
 
And one more view just for kicks!
 
 
Stampin' Up! products used!
Stamp Sets: Backyard Basics, Label Love
Card Stock: Not Quite Navy, Calypso Coral, Very Vanilla, Water Color Paper
Designer Series Paper: Paisley Petals
Ink: Not Quite navy, Black Stazon, Rich Razzleberry, Always Artichoke
Blender Pen
Backyard Basics Framelits
Artisan Punch
 
Thanks for stopping by today and have a very blessed day!

Friday, March 28, 2014

1st Birthday Scrapbook!

Good Friday Morning!  I am not going to say a lot for this post because I have so many pages to share with you.  Still have not decided if I will do a 6X6 book or an 8X8 book, but once I decide that, I will print them all out (reason for so many white pages, saves on ink) and put them in his book.  So here are all the pages I created using the Celebrate kit in My Digital Studio.


Did you notice I threw papa in there at the end?  Of course I was taking the pictures so not a picture of Grammy in this book.  I may have to put one in the book just for him though.
 
Hope your weekend is joyful!